


Building your own solar power system is one of the most empowering projects you can take on. It’s about more than just wiring and mounting panels; it's about taking control of your energy future. This guide is here to cut through the jargon and turn what seems like a massive undertaking into a series of clear, manageable steps.
We’re not going to drown you in technical manuals. Instead, we’ll focus on practical, real-world advice to give you the confidence you need to own your power. Let's get started.
Start Your Journey to Energy Independence
Building a DIY solar power for home system has never been more achievable. It's a hands-on way to slash your reliance on the grid, shrink your monthly electricity bills, and gain true self-sufficiency. This isn’t just about saving money—it’s about knowing exactly where your energy comes from and having a reliable power source you built yourself.
This guide is your roadmap. We’ll walk you through everything, from figuring out your actual energy needs to safely connecting the final component.
What to Expect From This Guide
Our goal is to give you a clear plan, whether you're powering a small off-grid cabin, an RV on the move, or your entire home. Here’s a peek at what we'll cover to get you there:
- Practical Energy Audits: Learn how to read your utility bills like a pro and track appliance usage to design a system that’s just right for you—not too big or too small.
- Component Selection: Get straightforward advice on choosing the right solar panels, batteries, inverters, and charge controllers that fit your budget and your goals.
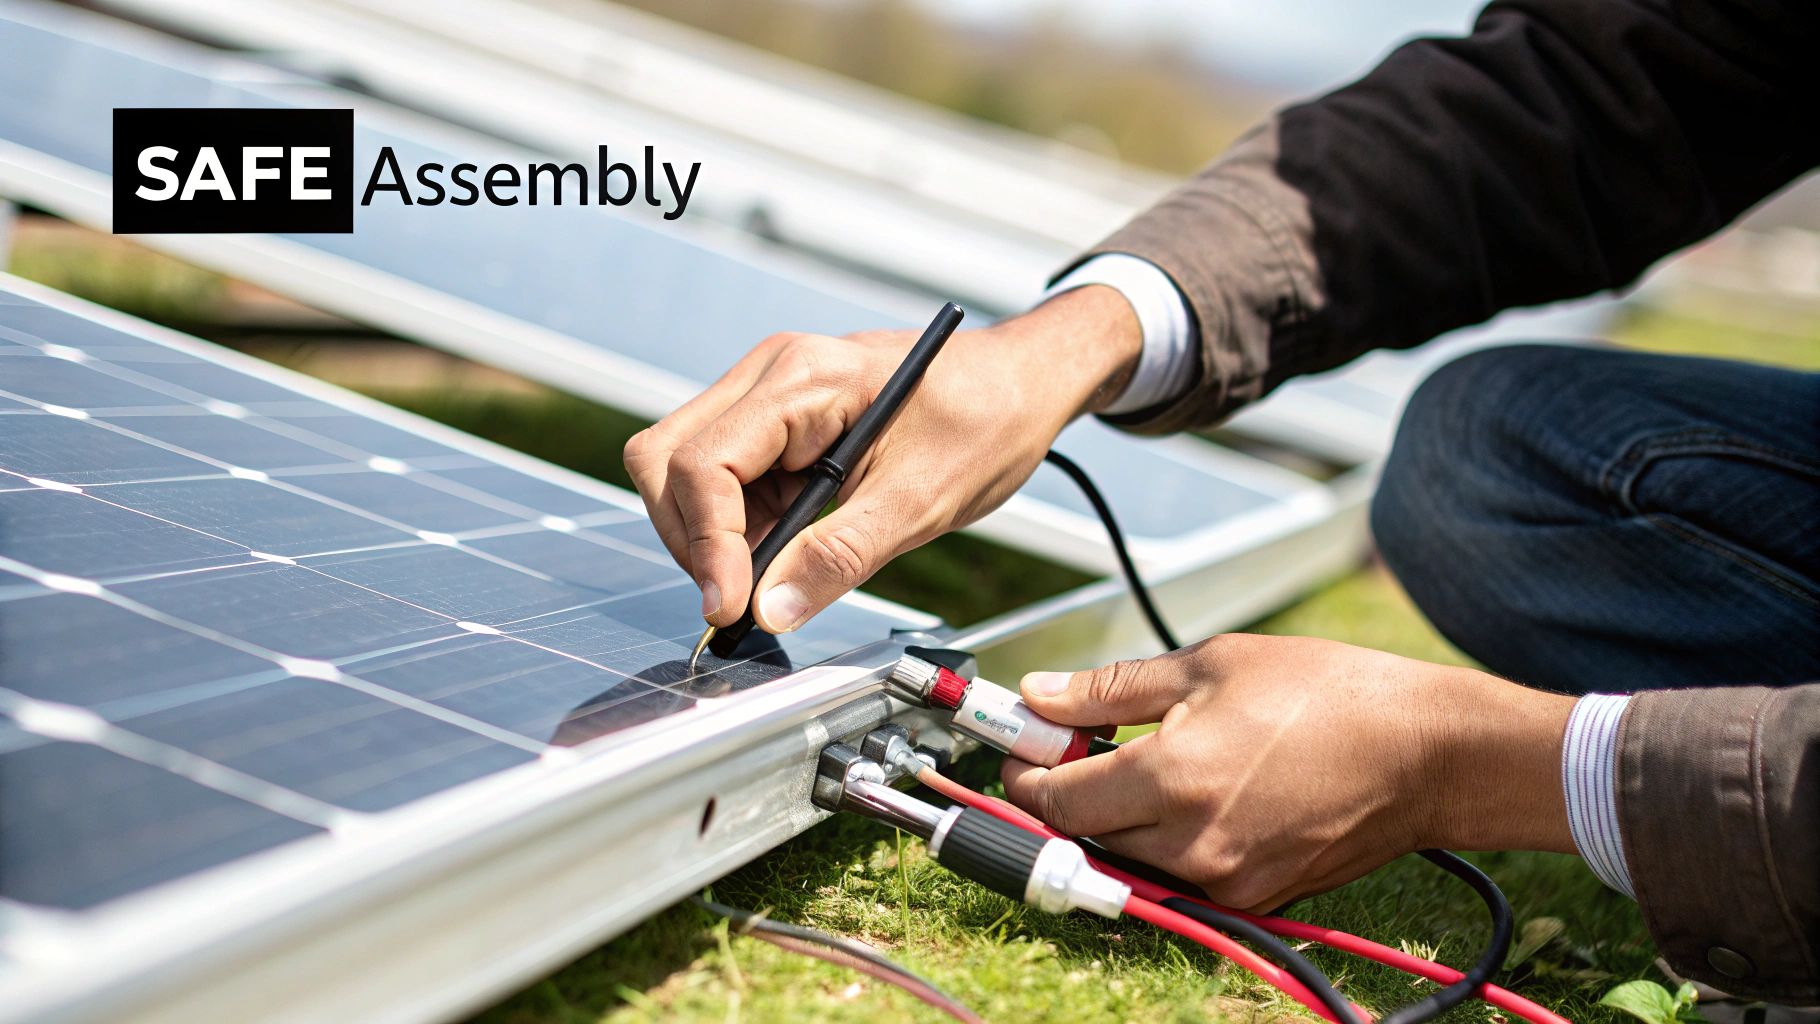
- Safe Assembly: We provide a step-by-step framework for putting it all together, with a heavy emphasis on safety protocols you can't afford to skip.
- Long-Term Maintenance: Discover the simple routines that will keep your system running at peak efficiency for years to come.
Many of the principles for home systems also apply to mobile setups. If you're looking at a smaller-scale project, you can learn more about finding reliable power for RVs and off-grid living in our dedicated guide.
Figure Out How Much Power Your Home Really Uses
It’s tempting to jump straight to browsing shiny new solar panels and batteries. We get it, that's the exciting part. But wait. The single biggest mistake DIYers make is buying gear before they know exactly how much power they actually use.
This isn’t about guesswork. It's about digging into the data to build a system that meets your needs without wasting money on oversized equipment or ending up with a system that can't keep the lights on.

Think of this as creating the blueprint for your system. Getting this "energy audit" right from the start saves you a world of frustration and cash down the road.
Start With Your Utility Bill
Your monthly electricity bill is a treasure map. It tells you precisely how many kilowatt-hours (kWh) your home used. One bill is good, but a full year's worth is the gold standard. Why? Because you'll see the seasonal swings—like when the A/C runs non-stop in July or the lights are on longer during dark winter months.
Here’s how to find your daily average:
- Grab your last 12 electricity bills.
- Add up the total kWh for the entire year.
- Divide that number by 365.
For example, if you used 10,950 kWh over the last year, your average daily use is 30 kWh. This number is your baseline—the starting point for everything else.
More and more homeowners are taking this step. In the first half of this year alone, global solar installations hit an incredible 380 GW—a 64% jump from the previous year. That's about 25 million households now powered by the sun, thanks in part to falling costs that make DIY solar a smarter move than ever.
Create a "Watts Worksheet" for Your Appliances
Your utility bill gives you the big picture. Now it’s time to zoom in. A "watts worksheet" is your secret weapon for understanding where every single watt goes. This is absolutely critical if you're planning an off-grid system, but it's a smart exercise for anyone.
The goal here is to separate your essential loads (the fridge, a well pump) from your non-essential ones (that massive TV, the kids' gaming console).
Start by listing your essential appliances. You can almost always find the wattage on a sticker on the back or bottom of the device.
Here's a quick example of what this looks like in practice:
| Appliance | Power (Watts) | Daily Hours of Use | Daily Energy (Wh) |
|---|---|---|---|
| Refrigerator | 150 W | 8 hours (cycling) | 1,200 Wh |
| LED Lights (5) | 50 W (total) | 6 hours | 300 Wh |
| Laptop Charger | 65 W | 4 hours | 260 Wh |
| Daily Total | 1,760 Wh |
Going through this process is eye-opening. You'll probably uncover a few "energy vampires" that suck power even when they're in standby mode. Once you have this worksheet filled out, you'll know exactly what your system needs to power—no more, no less.
Find Your Area's Peak Sun Hours
The last piece of the puzzle is figuring out how much usable sunlight your location actually gets. This is measured in peak sun hours, and it’s not just the number of hours from sunrise to sunset. A peak sun hour is an hour when the sun's intensity is 1,000 watts per square meter.
A house in sunny Arizona might get 6-7 peak sun hours a day, while one in the Pacific Northwest might only get 3-4. This number is a game-changer because it directly impacts how many panels you'll need to generate your target kWh.
Why it matters: Two homes can have the exact same energy needs, but if one is in Phoenix and the other is in Seattle, the Seattle home will need a much larger (and more expensive) solar array to produce the same amount of power. Ignoring peak sun hours is a recipe for an underperforming system.
Luckily, you don’t need to be a meteorologist. Free online resources like the Global Solar Atlas will give you precise data for your address.
Once you know your daily kWh consumption and your location’s peak sun hours, you have the two golden numbers for designing a system that works. While the math is similar for mobile systems, our guide on how many solar panels you need for an RV breaks it down for smaller, on-the-go setups.
Choosing Your Solar System Components
Now that you have your energy numbers dialed in, it’s time for the fun part—picking out the actual hardware. Think of this as a strategic shopping trip for the heart of your DIY solar power for home system. Every component you choose impacts the performance, longevity, and of course, the total cost of your setup. Getting this right from the start means building a system that’s efficient, reliable, and perfectly sized for what you need.
This is where the pieces of the puzzle start coming together. Let's walk through the core components.
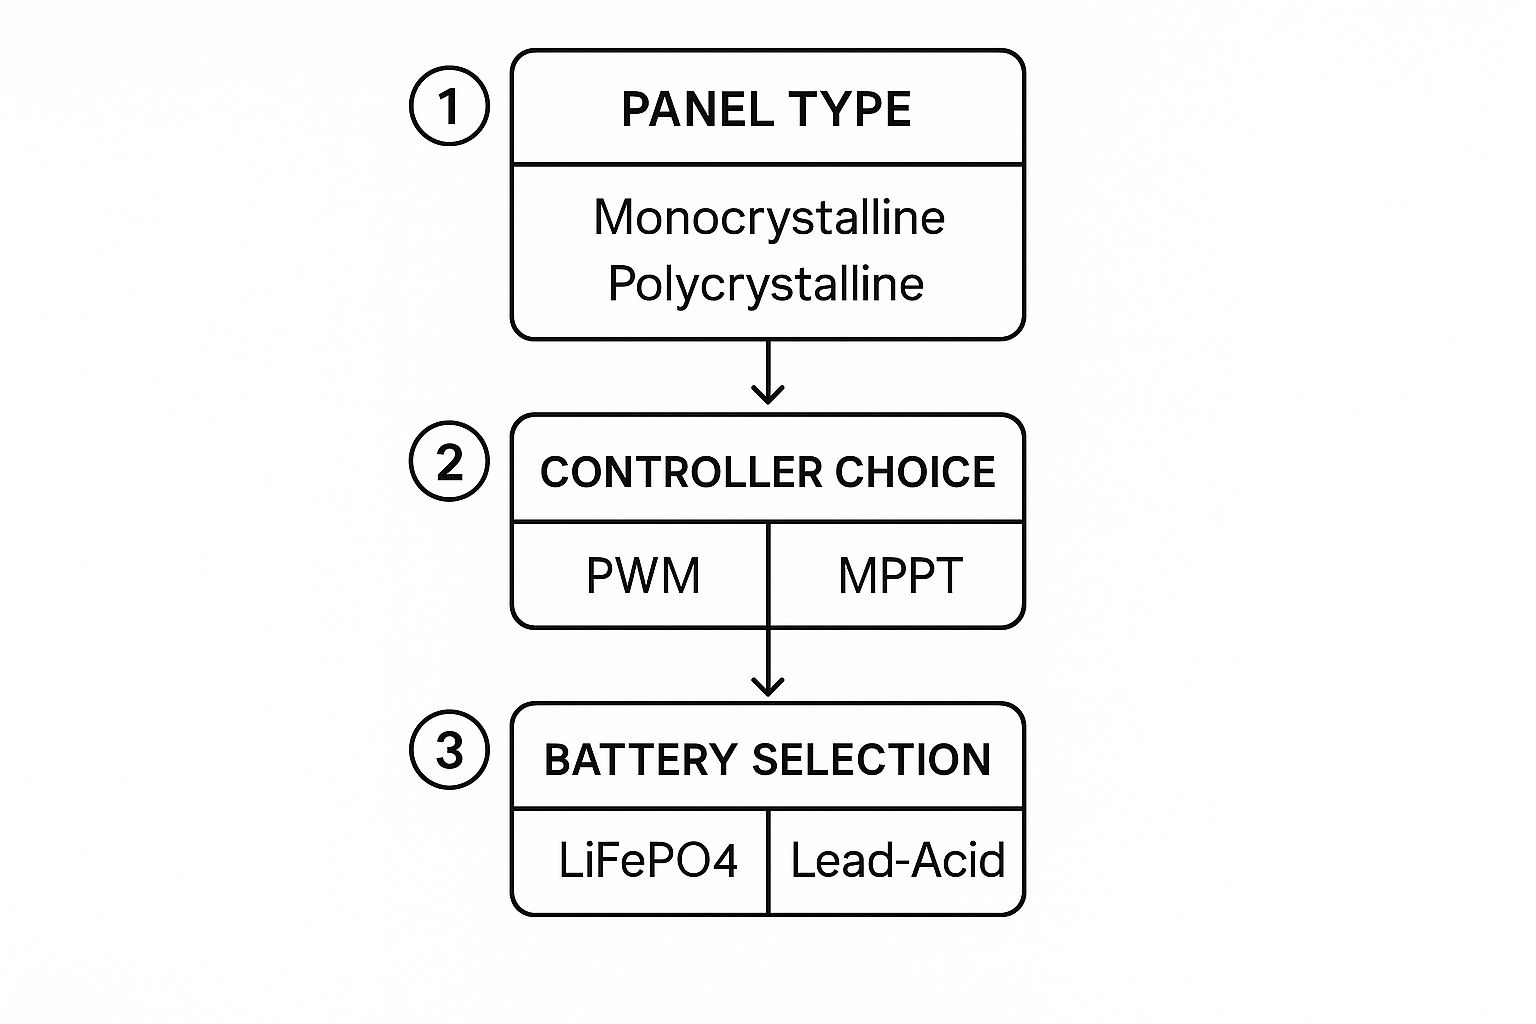
As you can see, each decision logically flows into the next. Your panel choice affects your controller, which affects your batteries, and so on. Let's break it down.
Solar Panels: Monocrystalline vs. Polycrystalline
Your solar panels are the workhorses of the entire system. They’re what you see, and they do the initial job of turning sunlight into electricity. The first major decision you'll face is choosing between the two dominant technologies: monocrystalline and polycrystalline.
Monocrystalline panels are the sleek, black ones. They’re made from a single, pure silicon crystal, which makes them more efficient. In plain English, they squeeze more power out of a smaller area.
Polycrystalline panels have that classic blue, marbled look. They're made by melting down multiple silicon fragments, a cheaper process that makes the panels more budget-friendly.
So, which one is for you? It really comes down to space and budget.
- Go with Monocrystalline if: You have a small roof or limited space and need to maximize every single square inch. They also tend to perform a bit better in high heat and low-light situations, making them the premium, do-it-all option.
- Go with Polycrystalline if: You’ve got plenty of room to work with and keeping the initial cost down is your top priority. While they are a little less efficient, modern poly panels are still incredibly reliable workhorses.
For most homeowners, the higher efficiency of monocrystalline panels ends up providing better long-term value, but both are solid choices.
The Brains of The Operation: The Charge Controller
If solar panels are the workhorses, the charge controller is the system's brain. This small but vital device sits between your solar panels and your batteries, and its main job is to regulate the voltage to prevent your batteries from overcharging. This single function is critical for protecting your expensive battery bank and making sure it lasts for years.
You’ll generally run into two types.
MPPT vs PWM Charge Controller Comparison
To help you decide, let's look at the key differences between the two main types of charge controllers: PWM (Pulse Width Modulation) and MPPT (Maximum Power Point Tracking). One is an older, simpler technology, while the other is a more advanced "smart" controller that can significantly boost your power harvest.
| Feature | MPPT (Maximum Power Point Tracking) | PWM (Pulse Width Modulation) |
|---|---|---|
| Efficiency | 95-99% efficient; can boost power harvest by up to 30% | 75-80% efficient; acts more like a simple switch |
| Best Use Case | Larger systems, cold climates, or when maximum power is critical | Small, simple systems (e.g., a single panel for a gate opener) |
| Panel Voltage | Can handle higher voltage panel arrays than the battery bank | Panel voltage must match the battery bank voltage (e.g., 12V panel for 12V battery) |
| Cost | More expensive upfront | Very affordable and budget-friendly |
| Performance | Excellent in all conditions, especially cloudy or cold weather | Efficiency drops in low-light or non-ideal conditions |
Ultimately, while an MPPT controller costs more, that 30% efficiency gain often pays for itself, either by letting you get by with fewer panels or just by delivering more usable power every single day. For any serious home system, MPPT is the way to go.
Powering Your Life: The Inverter Decision
Your solar panels generate, and your batteries store, Direct Current (DC) power. The problem? Nearly every appliance in your home—from the coffee maker to the TV—runs on Alternating Current (AC) power. The inverter is the component that bridges this gap, cleanly converting DC to AC.
The choice here comes down to the quality of the electricity it produces, which is determined by its sine wave.
- Modified Sine Wave Inverters: These are cheap and produce a choppy, blocky electrical wave. They might work for a simple power tool, but they can damage or completely fry sensitive electronics like laptops, modern TVs, and medical equipment.
- Pure Sine Wave Inverters: These produce a smooth, clean wave of electricity that’s often identical to—or even cleaner than—the power you get from the utility grid. They are compatible with everything and are the only real choice for a home solar system.
Don’t try to save a few hundred bucks here. Using a modified sine wave inverter with your expensive appliances is a gamble you don’t want to take.
The Heartbeat of Your System: Lead-Acid vs. LiFePO4 Batteries
Finally, we get to the battery bank. This is where you store all that beautiful energy you’ve generated, making it arguably the most important long-term investment in any off-grid or hybrid system.
For decades, the standard was deep-cycle lead-acid batteries. They’re heavy, require regular maintenance (like checking water levels), and don’t last nearly as long as modern alternatives.
Today, a newer technology has become the undisputed champion for home solar: LiFePO4 (Lithium Iron Phosphate). The initial cost is higher, no doubt. But the long-term benefits are so massive it’s not even a fair fight.
Here’s a quick rundown of why LiFePO4 is the clear winner:
- Deeper Discharges: You can safely use 80-100% of a LiFePO4 battery's capacity, compared to just 50% for lead-acid. You get way more usable energy.
- Massively Longer Lifespan: We’re talking 3,000 to 7,000+ charge cycles for LiFePO4 versus just a few hundred for lead-acid.
- More Efficient: LiFePO4 batteries are over 95% efficient, meaning almost all the power you put in, you can get back out.
- Zero Maintenance: Install them and forget them. No checking water levels, no fuss.
The math is simple: a LiFePO4 battery can last up to 10 times longer and provides nearly double the usable power for the same advertised capacity. It’s a far, far better investment over the life of your system. Even small solar devices benefit from reliable components; see how in our review of a Zeeporte solar security camera.
Assembling Your DIY Solar Power System Safely
Alright, this is where all that planning pays off. You’ve got your components, you know your energy needs, and now it’s time to actually build your DIY solar power for home system. If you take it one step at a time, the process is logical, but let's be clear: the most important tool you have is an unwavering focus on safety.
We're going to work from the outside in. First, we'll get the panels mounted, then we'll tackle the wiring in the right sequence. Think of it as capturing the sun first, then bringing that power safely into your home.
Mounting Your Panels Securely
Your solar panels are going to live through decades of everything Mother Nature throws at them—wind, rain, snow, and relentless sun. Their mounting system is the bedrock that keeps them safe and productive, so this is definitely not the place to take shortcuts.
For a roof install, the first job is to find your roof rafters. These are the only things strong enough to anchor your racking system to. A good stud finder and a chalk line are your best friends here; map everything out before you even think about drilling.
If you’re doing a ground-mounted system, your foundation is all about concrete footings. You have to dig below your local frost line, otherwise the whole array will heave and shift with the seasons. And be patient—let that concrete cure completely, which can take up to a week, before you mount the rails and add the heavy panels.
Here are a few tips that apply to either method:
- Waterproof every hole. If you’re on the roof, every penetration needs flashing and a top-shelf sealant made for roofing. Trust us, water damage is a sneaky, expensive problem you don’t want to deal with later.
- Get your angles right. Make sure your mounting rack is tilted to catch the most sun for your latitude. Many kits are adjustable, so you can fine-tune it for peak performance.
- Use the right hardware. Stick to the bolts and clamps that came with your racking kit. They were engineered specifically for the job.
Once the rails are rock-solid, you can start lifting the panels into place. A pro tip: connect the panel wiring before you bolt them down completely. Those connections can be a real pain to get to once everything is locked in.
Understanding Panel Wiring: Series vs. Parallel
How you wire your panels together seriously affects your system's output. You have two main choices: series or parallel. Which one you pick comes down to your charge controller's specs and what you’re trying to achieve.
Wiring in series is like stacking batteries. You connect the positive terminal of one panel to the negative of the next one in the chain. This adds the voltage up while the amperage stays the same.
Wiring in parallel is more like adding lanes to a highway. You connect all the positives together and all the negatives together. This keeps the voltage the same as a single panel but adds up the amperage.
So, why choose one over the other?
- Series wiring is your go-to for long wire runs. Higher voltage loses less power over distance, and it’s often needed to hit the minimum voltage for high-efficiency MPPT charge controllers.
- Parallel wiring is the winner for partial shade. In a series string, if one panel gets shaded, it can tank the output of the entire string. With a parallel setup, a shaded panel only affects its own output, not its neighbors.
Bigger systems often use a hybrid approach—creating a few series strings and then wiring those strings together in parallel. Just remember to always check your charge controller’s manual for its maximum voltage input. Going over that limit will fry it instantly.
In the spirit of full transparency, if you decide to make a purchase through my link, I may earn a small commission—at no additional cost to you. Thank you so much for your Support
The Correct Order of Component Wiring
When it’s time to wire up the brains of the operation—the charge controller, batteries, and inverter—there's a strict order you have to follow. Getting this wrong can send voltage spikes that will destroy your expensive gear.
The golden rule is simple: connect the battery first, disconnect it last.
Here’s the safe sequence for connecting everything:
- Charge Controller to Battery Bank: This is your first move. Connecting the battery lets the charge controller boot up and learn the system’s voltage (12V, 24V, or 48V) before any solar power gets involved.
- Solar Panel Array to Charge Controller: Once the controller is on and stable, you can connect the wires from your panels. The controller will immediately start managing the sun's energy to charge the batteries.
- Inverter to Battery Bank: Your inverter is a power-hungry beast, so it needs to be connected directly to the battery terminals with heavy-duty, properly sized cables.
- AC Loads to Inverter: Finally, plug your appliances or connect your sub-panel to the AC output side of the inverter.
When you need to power down for maintenance, just go in reverse. Disconnect the solar panels first, then the AC loads, and finally, unhook the battery from the inverter and charge controller.
Safety First, Always: DC electricity, especially from a big battery bank, is no joke. Always work on a de-energized system, use insulated tools, and double-check that every connection is positive-to-positive and negative-to-negative before you flip a single switch.
A Critical Note on Professional Help
This guide gives you a solid roadmap for putting together a DIY solar power for home system. But the final connection—tying your system into your home's main electrical panel—is a job best left to the pros.
For your own safety and to make sure you’re up to code, we strongly recommend hiring a licensed electrician for this last step. They'll ensure your system is properly grounded, has the right breakers, and will pass any required inspections. It’s a small price to pay for a whole lot of peace of mind.
Commissioning and Maintaining Your System
Alright, this is the moment you've been waiting for. Flipping the switch on your brand-new DIY solar power for home system is a huge milestone. All that planning, mounting, and wiring comes down to this. But hold on—a safe, methodical power-up is absolutely critical to protect your gear.
Once you're up and running, the game changes from building to maintaining. The goal now is to keep your system humming along, delivering clean energy for years to come.
Let's walk through the initial power-up checklist and then cover the simple routines that will keep your system performing at its peak.
Your Safe Power-Up Checklist
Before you energize anything, stop. Take a breath and double-check your work with fresh eyes. Rushing this part can lead to costly mistakes. A slow, methodical approach here prevents headaches and ensures a smooth, safe start.
Here’s the sequence to follow:
- Verify Every Single Connection: Seriously, go back and check every lug and terminal. Make sure they're tight. Most importantly, confirm your polarity is correct (positive to positive, negative to negative) all the way from the panels to the inverter.
- Power Up the Batteries First: Flip the circuit breaker or fuse between your battery bank and your charge controller/inverter. This lets the electronics wake up and calibrate themselves to the system's voltage without any other variables.
- Energize the Solar Array: With the core components now powered by the batteries, it's safe to turn on the breaker connecting your solar panels to the charge controller. You should see the controller light up and start registering the incoming solar power almost immediately.
- Activate the Inverter: Last but not least, turn on the inverter itself. Once it’s running, grab a small AC load—like a lamp or a fan—and plug it in to confirm it’s successfully converting DC to AC power.
And just like that, you're officially generating your own power. Congratulations! Now, let's keep it that way.
Simple Long-Term Maintenance Routines
A well-maintained solar system is an efficient one. The good news? The upkeep is minimal and surprisingly simple. A few quick checks a couple of times a year are all it really takes to maximize your energy harvest and protect your investment.
This proactive approach is more important than ever. Globally, a record 585 GW of new solar was installed last year alone—a massive 30% jump. With 78% of installers expecting sales to climb even higher, taking good care of your own DIY system is just smart ownership. You can dive into the latest solar trends and see the full report on Ember Energy's website.
Here’s what you need to focus on:
- Panel Cleaning: Dust, pollen, and the occasional bird dropping can build up and slash your output. For most people, a simple rinse with a garden hose a few times a year does the trick. If you have stubborn grime, a soft brush with soapy water will handle it.
- Wiring Inspections: At least once a year, do a visual inspection of all your wiring. Look for any signs of wear, corrosion, or damage from critters. Give the connections a gentle tug to make sure they're still tight and secure.
- Battery Health Checks: If you went with LiFePO4 batteries, you're in luck—they are basically maintenance-free. For traditional lead-acid batteries, you’ll need to pop the caps and check the water levels periodically, making sure the terminals are clean and free of corrosion.
- Monitor Your Performance: Keep an eye on your system’s daily output using your charge controller’s display or a monitoring app. A sudden, unexplained dip in production is almost always the first sign that something needs a closer look.
Common Questions About DIY Home Solar
Even the best-laid plans can hit a snag. When you're building a DIY solar power for home system, it's natural for a few last-minute questions to pop up. We get it.
These are the practical, real-world concerns we hear all the time from builders just like you. Let's get them answered so you can move forward with total confidence.
How Much Money Can I Realistically Save?
Your savings really boil down to three things: your system's size, how much power you actually use, and what your local utility company charges per kilowatt-hour.
The biggest win with any DIY project is slicing out the labor costs. Professional installation can account for a significant portion of the total bill, so by doing it yourself, you're massively fast-tracking your payback period.
To get a ballpark idea of your return on investment, try this simple formula: divide the total cost of your components by what you pay on your monthly power bill. This will give you a rough estimate of how many months it'll take to break even.
Do I Need a Permit for My Installation?
For almost any system that's physically attached to your house, the answer is a hard yes.
Local building departments want to see your plans to make sure the system is safe and up to current electrical codes. This usually means submitting a system design and a wiring diagram for approval before you start the install.
Why it matters: Trying to sidestep the permit process might feel like a clever shortcut, but it can backfire. You could be looking at fines, an order to tear the whole thing down, or even having your homeowner's insurance voided. Always, always check with your local authority before you buy a single component.
Now, if you're talking about a small, standalone off-grid setup for a shed or an RV, the rules might be more relaxed. But you still need to verify first.
Can I Connect My DIY System to The Grid?
Technically, yes, but this is where DIY gets really complicated. Connecting to the utility grid is a major league project that absolutely requires a licensed electrician and direct coordination with your power company.
These "grid-tie" systems have to meet incredibly strict safety standards, including something called anti-islanding protection, which is frankly beyond the scope of most DIY projects.
That's why this guide focuses on off-grid and hybrid systems that use battery storage. They offer a much more realistic and direct path to energy independence for the hands-on homeowner.
Ready to take the next step toward energy independence? At TriSolar, we provide the in-depth reviews and practical guides you need to build your system with confidence. Explore our resources and find the right components for your project today.
Disclaimer: if you decide to make a purchase through my links, I may earn a small commission—at no additional cost to you. Thank you so much
%20(1).jpg?width=1600&height=896&name=How%20to%20Make%20Your%20Own%20Solar%20Panel%20(Step-by-Step%20Guide)%20(1).jpg)